Connect Data Source
Get help connecting your data source to Athenic AI
PostgreSQL, MySQL / MariaDB, Microsoft SQL Server, PlanetScale
SQL Databases
PostgreSQL, MySQL / MariaDB, Microsoft SQL Server, PlanetScale
Data source name * | This name is how you'll identify your data source within Athenic AI. |
Host * | This is the IP address or hostname that serves as your database's address. |
Port * | This is the number of the gate that your database server opens for communications. |
User * | This is the identity you'll use to log in to your database. |
Password * | This is the secret code to authenticate your username and log in successfully. |
Database * | This refers to the specific database to which Athenic AI will connect on the provided host. |
SSL mode | This refers to the configuration you would like to set up for Secure Socket Layer mode. This is set to preferred by default. |
Athenic AI IP Address | When connecting to SQL datasources, we connect from |
Data Warehouses
Amazon Athena
Fill the Data source name with the name that you'll identify your data source with in Athenic AI.
To learn how to obtain your AWS Access Key ID and AWS Secret Access Key, see Access keys on the AWS website
The server name is often the endpoint URL which is formed like "athena.[region].amazonaws.com". You replace [region] with your actual AWS region that Athena is running in. You can find a full list of Athena endpoints in the Amazon Athena Documentation.
If you want to connect with work group, you can find the list of your work group names on the Amazon Athena console.
If you want to connect with S3 result path, you can find the list of your bucks in the AWS S3 service. To construct your S3 bucket path, start with
s3://followed by the bucket name.
Snowflake
Fill the Data source name with the name that you'll identify your data source with in Athenic AI.
Fill in your Snowflake username and password in the user and password fields provided
To find your account ID, visit How to find Account ID on the Snowflake site
Files & Sheets
Google Sheets
From your Google Sheets workbook, navigate to the top right corner and click on the Share button, then copy the URL link.
On the same popup, under General access, set it to "Anyone with the link".
Transition to the Athenic AI application and navigate to the datasource page, where you can select Google Sheets.
Fill the Data source name with the name that you'll identify your data source with in Athenic AI.
Insert the copied URL into the Workbook URL field.
Fill in the name of your Google Sheets name that you wish to connect
Proceed by clicking the Connect button.
CSV
Fill the Data source name with the name that you'll identify your data source with in Athenic AI.
Upload your file. It must be in CSV format.
You can add as many files as you like up to 100 MB altogether.
BigQuery
From the BigQuery API page, select the project that you want to access and navigate to the “Credentials” tab.
Click on “Manage service accounts” and then “Create Service Account” to start creating a new service account.
When on the step to grant access to the project, make sure to select the “BigQuery Admin” role under the BigQuery category.
After creating the account, click on the account you just created and navigate to the “Keys” tab.
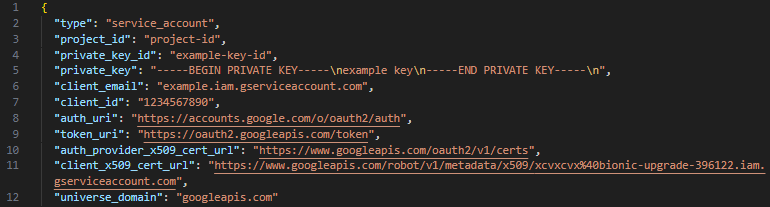
Click on “Add Key” and “Create new key.” Select the JSON option, which should download a JSON key to your computer.
Open the file in a text editor (an example is below).
In the Athenic app, ccopy the information into the corresponding sections in the “Configure data source” page for BigQuery. For example, “project_id” corresponds to “Project ID.”
Add a data source name and continue with data source creation.
Airtable
Open the Airtable API page,. and click the Airtable base that you want to use.
The base ID can be found in the URL of the API page of the base. In the URL, the base ID is immediately after
https://airtable.com/and starts withapp.Fill the Data source name with the name that you'll identify your data source with in Athenic AI.
Fill the base ID field with the base ID found in step 2
Fill in the name with the name of the Airtable that you wish the connect
To learn how to obtain your Airtable API key, see How do I get my API key? on the Airtable site. A valid Airtable API key must always start with
key.
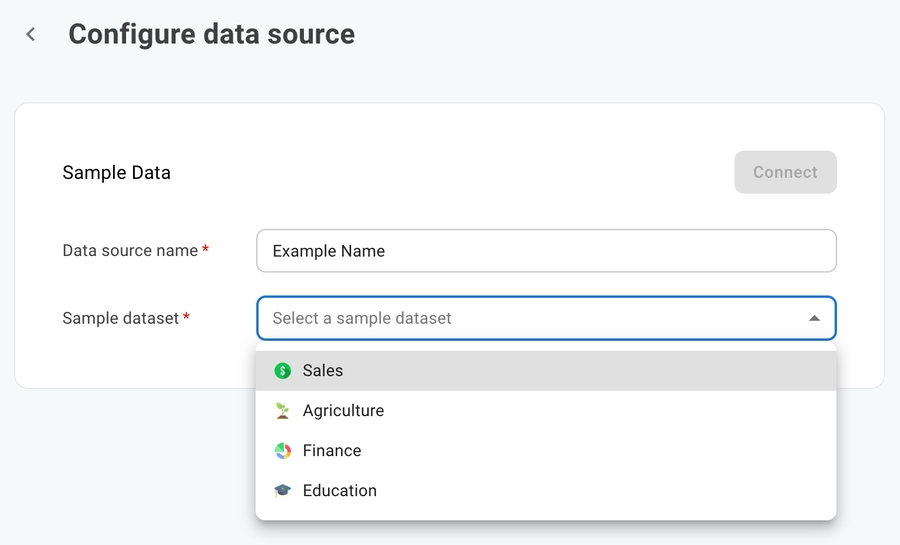
Sample Data
Athenic AI provides a collection of sample datasets for you to explore the product with.
Fill the Data source name with the name that you'll identify your data source with in Athenic AI.
Simply select the dataset that interests you from the dropdown.
Next Step
Once we have connected to our data source, the next step will be selecting what tables and columns we want to include in our project. Configure Data Source page.
Last updated